I decided to concentrate on the different ways you can get images and video onto sites on the web for public viewing and feedback reviews.
I looked at;
• YouTube – which allows anyone to watch and share original videos online.
• Flickr – which allows you to upload and share your photos online either by sending them over the web or via camera phone.
• GoogleVideo – which allows you to upload video, provided you own the necessary rights.
I signed up to all of the above and uploaded a video to YouTube and GoogleVideo and a picture to Flickr. All files uploaded without any problems but YouTube took the longest to load. In terms of getting your work seen by as many people as possible all 3 sites have their uses, you can even integrate the videos directly into blogs or websites and they are all free to use. There are literally millions of images and videos that have been shared worldwide.
I am interested in producing some film or animation work and in this regard I could find using YouTube and GoogleVideo and in some ways Flickr constructive in terms of getting the work seen be an audience with the power of rating my work after viewing it. People can rate the work out of 5 stars, leave a comment or email a link to the video to friends, family or colleagues. By reviewing the responses you can tell if your work is well received and worth marketing to a more profitable kind of mass media such as through TV production or pay per view download.
http://www.youtube.com/
https://upload.video.google.com/
http://www.flickr.com/
http://www.bbc.co.uk/wales/capturewales/
http://www.thetrailermash.com/
Friday, October 06, 2006
Thursday, October 05, 2006
TECHNIQUEST - BRIEF 1
Film/Music Mixer
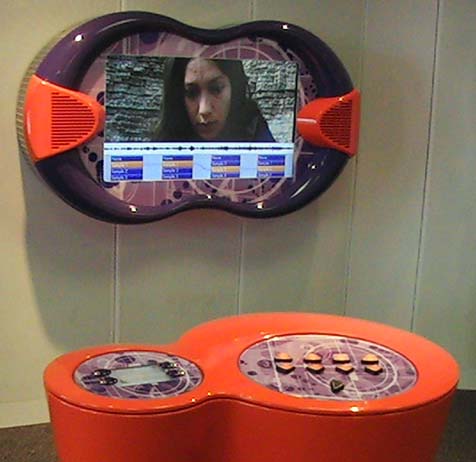
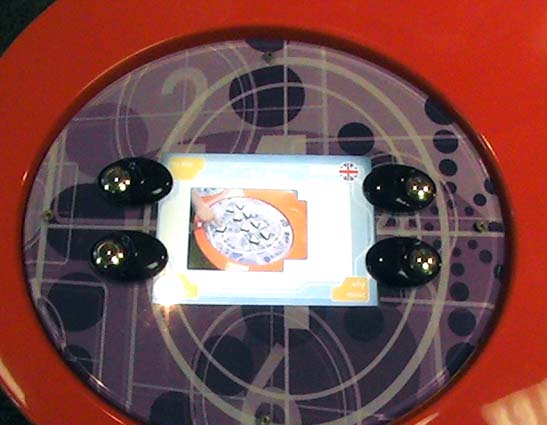
Once you approached the film/music mixer after being attracted to it by its big screen all you do is press the "try me" button on the top left of the left control panel. On pressing this you receive simple on screen instructions to "Press the play button to watch the film".
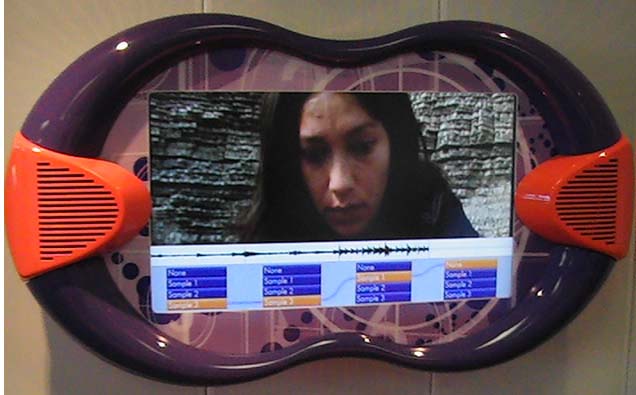
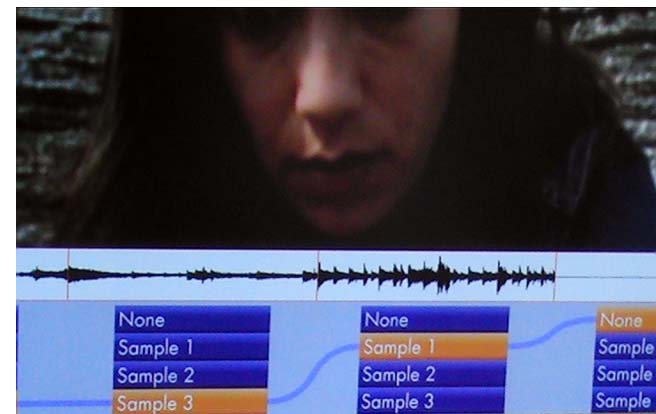
 The play button is green and is place on the right-hand control panel. It looks like the standard play button that we’re used to on CD/DVD players. Once you’ve pressed it the movie starts to play on the LCD screen on the wall. As you watch it you can see the rate of play in the timeline and it also shows you the audio waveform of the music tracks that you can choose to play along to the video.
The main point of the exhibit is to get you to interact with what music is playing along with the video by using the 8 buttons above the play button. The video and audio is split up into 4 segments and by using 2 of the buttons that line up with that segment you can choose between having no music or a choose 1 of the 3 different music tracks in that particular segment.
The user learns how to use the exhibit after the initial instructions by trial and error. You press the buttons on the control panel above the play button and you get immediate visual feedback on screen (where you can see that the track has changed) and audio feedback (you hear a different music track or no music at all).
The target audience as with most of the exhibits on the top floor is older kids – teenagers and young adults. This has influenced the design in that instead of using bright primary colours to attract the user they’ve used orange and purple and a big screen. The interface on screen uses visual cues linked to the music that younger kids are unlikely to understand or appreciate fully, especially the audio waveforms.
The film/music mixer is fun to use, simple to learn (you get immediate visual and audio feedback after pressing a button) and it gives you an insight into how music video’s and film scores are put together which should appeal to the MTV/Ipod generation or whatever they’re called now.
In regards to HCI (human computer interaction) and usability I would say that it was
• Easy to learn and use.
• Memorable, in the fact that you wouldn’t have to relearn a difficult process
• Useful as a teaching and entertainment device
• Flexible, all in all you have 16 options of where you link the music or lack of music to the video.
• Efficient, you only have 4 states to choose from at a time in each of the 4 segments and the only mistake you can really make is not doing anything at all.
• Enjoyable to use and entertaining.
• Good to look at.
I think the exhibits lack of instruction bar “press the play button” encourages a general button bashing and self learning experimentation which aids interaction with the exhibit.
gogglevideo
Wednesday, October 04, 2006
Techniquest
Today we visited Techniquest to look at and interact with the exhibits they have on show there.
Tuesday, October 03, 2006
Design For Interaction 2
Interface Design and Usability
HCI - Human Computer Interaction
A HCI approach aims to
(Nielsen 2001)
Usability principles useit.com nng.com
HCI - Human Computer Interaction
- Design, evaluation and implementation
- A bridging
- Humans - Computers
A HCI approach aims to
- Support
- Extend
- Optimisation
- How ?
- Learnability
- Re-learnability Memorable
- Utility
- Flexability
- Effeciency
- Safety
- Effectiveness
- Usability Criteria
- Feel
- Satisfying
- Aesthetically pleasing
- Enjoyable
- Fun
- Entertaining
- Motivating
- Helpful/supportive
- Rewarding
- Emotionally Fullfilling
(Nielsen 2001)
Usability principles useit.com nng.com
CCS Notes
notes for ccs taken by Kirsty
Chatted about what info we’d found out about peer-to –peerNapster or a link – unstructured – p2p
Tapestry – structured p2p
Discreet (closed to outside world) networks for specialised areas
Another social network
History of internet – internet is simply inter networks –
How computer networks mirrored social net
6% of separation we’re all only 6 connections away from each other
Trace through address books 6 times to get to who you want
Hub
http://www.flickr.com/blog.gne?photo=258439096
Small world theory
The hub would be the most likely to know others in different groups
GOOGLE – searches Documents are most trustworthy if there are lots of links to them
Dark net (underground)
Nutella napster – issues behind them p2p – legal issues
List of companies of people are not happy with p2p
E.g. Sony, MGM
Copydex – underground movement – giving music away free
Embrace – play to enjoy music not to make money – hold secret gigs
Don’t believe in the copyright for music – just on name
Pre internet copyright movement
Music Industry
Producers (view) - people listening , merchandising, press & promotions,
How to get known
PureVolume – can lead to record deals
My space –
Distributors – charge – approx 50% of profits
Strategy of promotion
Merchandising
Maintaining brand of the band
Most of the revenue is through merchandising and live events
Self Distribution
Internet promotion
Pod casts
I Tunes 99p download
New bands have pop up of samples
Frattellis
Mass protest against record companies (people power)
Donate money to the band
Using the networks to promote
E.g. DJ’s / bands if you listen \ download a set and you like them you’ll be likely to pay to go and see there next gig/ dj set
Technical p2p
Social p2p
Cultural impact
Marketing – Significant word of mouth
In a peer 2peer networks if you can find the hub you can contact them for their contacts
If you want something rare important it is hard to get into the closed social networks
Spys undercove
Monday, October 02, 2006
PRODUCT ANALYSIS - BRIEF 2
Product Interface Interaction
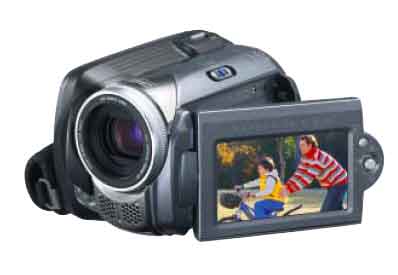
The product that I have chosen to review is JVC's GZ-MG26 Everio Hard Disk Camcorder. It is portable (handheld and compact), has a multimedia interface (display screen), and has some features that could be redesigned or features that could be introduced.
Description and Functionality
The product itself is a handheld digital camcorder with a built in 20GB hard drive. You can also be use it as a digital camera to take still images. It is built out of a strong black and gunmetal plastic (as are the buttons, knobs and levers) and the lens housing is made out of aluminium.
Shooting is simple. Just flip
 out the LCD monitor screen, select the camera or video mode and press the record button. All photos and video are stored on the large built-in 20 GB hard drive which can hold between 290 to 1500 minutes of video and up to 9999 still images depending on the compression rate and picture
 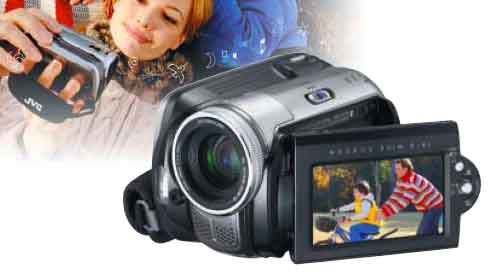 quality.
Judging by its online brochures it's intended users are families in there 20's and 30's who are computer literate and willing to learn simple editing software to produce their own DVDs.
Apart from taking video and stills you can use the camcorder to view these image in its LCD screen or hook it up to a TV monitor or via saving them to a PC. You can re-order the scenes or delete them and add special effects to the playback of the video.
Concerning the environment within which it can be used its mainly designed for daylight conditions but it does contain a white LED and a night scope for darker conditions. You can also buy tripods, flashguns and a marine case for under water shooting up to 30 metres.
To access the functions of the device you mainly use the menu button, the index button and the control lever to move around the display and interact with the onscreen interface menus. In terms of m
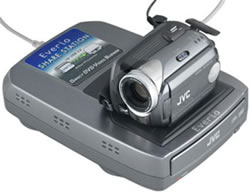 ultimedia you can view what you have recorded on TV, copy it to PC to edit fully from there, or you can burn DVD’s directly onto a “share station DVD burner” and view the footage on any device that plays DVD’s.
Interface Design
The interfaces look and feel is typical of most camcorders with various symbols, battery levels and other information on top of the footage on screen. But when you press the main menu button th
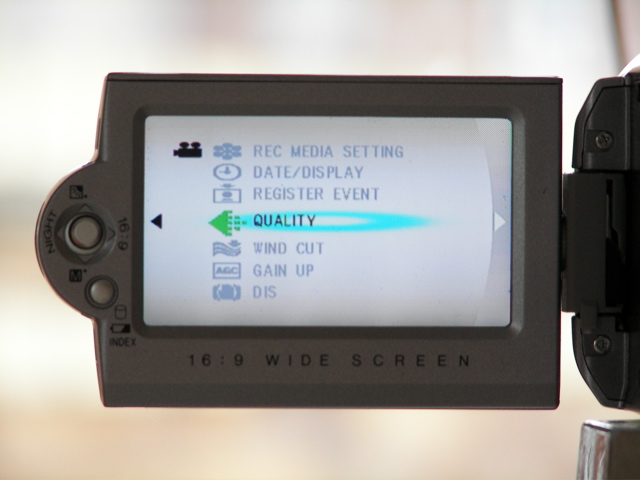 e interface is more like a mobile phone menu with animated icons next to text descriptions. Even the control lever, which you use to navigate up, down and left, right through the on screen options is reminiscent of the joystick controls on many mobile phones, especially Sony Ericsson models.
In play mode as opposed to the record mode the interface splits the screen up into 9 rectangles, each one containing a snapshot of the first frame of a video or a photo. If you have more than 9 videos/photos stored on the camcorder a scrollbar appears on the far right showing that you that you can scroll down onto further content. Using the control lever you can view full screen photos or play full screen videos. You can also pause, scan and zoom into the videos and photos using the control lever and the interface.
The interface is easy to use but when using the menu functions you really need to have the users manual to hand to know where to look for relevant functions and what they do. Using trial and error here would just lead to a lot of errors and you would lose track of where you’ve been. When in play mode, since its all visual you can instantly see where you are and what videos/photos are only one click away. This instant feedback is more user friendly and invites more trial and error interaction because your only one click back to its main interface so its hard to go wrong and lose yourself.
In terms of human cognitive processes I would say that the interface
• grabs your attention with its use of animated icons.
• in terms of perception uses easily distinguishable icons but not all of them have obvious representation.
• in terms of memory and learning has some actions in common with other camcorders which aids the learning experience if you have prior knowledge to bring to the device but would be difficult to master if you didn’t have a user manual to refer to.
Task Analysis
The online brouchures mention that you can perform simple editing in camera, so this is the task I’ll try to analyse. First of all you have to create a playlist which will enable you to organise recorded video in order of preference. To do this you select the power switch to the play mode; set the mode switch to video; press the menu button; then select the “playlists contents” option on screen; choose “NEW LIST”; then select a file from the scenes you have saved on the camcorder to add to the playlist; when using multiple files in the playlist you can choose the exact order you want the scenes to run or delete unwanted files; when you’ve finished your playlist, save and quit. To pl
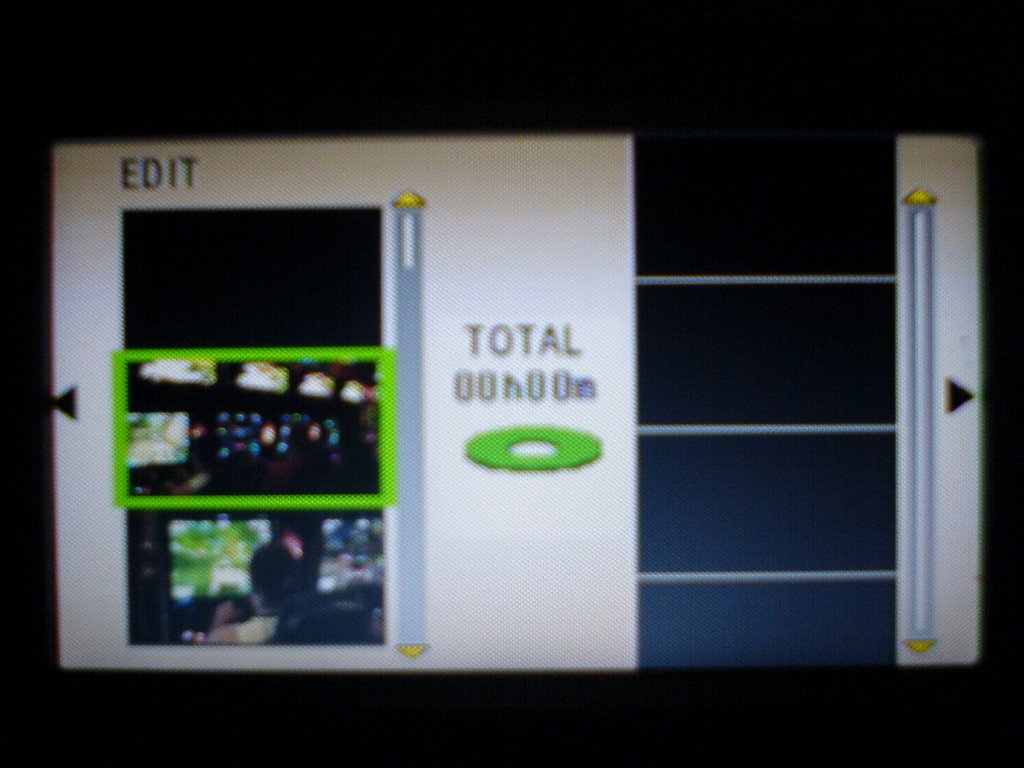 ay the playlist when in the “playlist contents” screen select your required playlist and use the toggle switch to play/pause or stop the scene.
To perform this task you definitely need to have the users manual to hand (which is 70 pages long and printed in black and white). But once your on the editing screen you’ll find the interface is really easy to use. The left of the screen has all the scenes on the disc, which you can scroll through and the right of the screen is where you place the scenes that you have chosen in the order that you want them.
Contempory Contextual Studies 2
Kirsty took notes of this session and Simon recorded it to put on a podcast. We talked about what we'd found out about P2P networks.
6 degrees of seperation, we are only 6 steps away from knowing each other-Small world theory.
Next blog to be on : Stars of CCTV
www.ubermatic.org/life/
6 degrees of seperation, we are only 6 steps away from knowing each other-Small world theory.
Next blog to be on : Stars of CCTV
www.ubermatic.org/life/
Subscribe to:
Posts (Atom)